Keystone Inputs
The Keystone Calculator does its calculations based on a camera with a full frame 35mm sensor measuring 24mm by 36mm. This sensor has an aspect ratio (the ratio of the sensor height to its width) of 2:3. Cameras with full frame sensors include:
- Canon 1D
- Canon 5D
- Canon 6D
- Nikon D4S
- Nikon Df
- Nikon D750
- Nikon D810
- Sony SLT A99
"Half Frame" Cameras
If you are using a camera with a smaller sensor such as in APS-C (or APS-H) sensor then when using the calculator you must enter the 35mm equivalent focal length of your lens, not the true focal length.
Cameras with APS-C sensors include:
- Canon EOS 7D
- Canon EOS 70D
- Canon EOS 60D
- Canon EOS 50D
- Canon EOS 40D
- Canon EOS 30D
- Canon EOS 20D
- Canon EOS 10D
- Canon EOS 700D/Rebel T5i
- Canon EOS 650D/Rebel T4i
- Canon EOS 600D/Rebel T3i
- Canon EOS 550D/Rebel T2i
- Canon EOS 500D/Rebel T1i
- Canon EOS 450D/Rebel XSi
- Canon EOS 400D/Rebel XTi
- Canon EOS 350D/Rebel XT
- Canon EOS 300D/Rebel
- Canon EOS 100D/SL1
- Canon EOS 1100D/Rebel T3
- Canon EOS 1000D/Rebel XS
- Canon EOS D60
- Canon EOS D30
- Nikon D1H
- Nikon D1X
- Nikon D2H
- Nikon D2Hs
- Nikon D2X
- Nikon D2Xs
- Nikon D40
- Nikon D40x
- Nikon D50
- Nikon D60
- Nikon D70
- Nikon D70s
- Nikon D80
- Nikon D90
- Nikon D100
- Nikon D200
- Nikon D300
- Nikon D300S
- Nikon D3000
- Nikon D3100
- Nikon D3200
- Nikon D3300
- Nikon D5000
- Nikon D5100
- Nikon D5200
- Nikon D5300
- Nikon D5500
- Nikon D7000
- Nikon D7100
"Micro Four Thirds" Cameras
Cameras with a Micro Four Thirds sensor have a sensor that is a different shape to full frame and APS-C sensors. Four Thirds sensors have an aspect ratio of 3:4 as compared the 2:3 aspect ratio of full frame and APS-C sensors.
The Keystone Calculator does all its calculations based on an aspect ration of 2:3.
If you are using a camera with a Micro Four Thirds sensor then you must enter the lens focal length as the 35mm equivalent focal length, not the true focal length.
You should also specify a wider Border when preparing your group to allow for the fact that your camera's sensor is a different shape to the full frame sensor used by the calculator.
Cameras with Four Thirds sensors include:
- Olympus E-5
- Olympus E-1
- Olympus E-3
- Olympus E-30
- Olympus E-620
- Olympus E-600
- Olympus E-500
- Olympus E-510
- Olympus E-520
- Olympus E-300
- Olympus E-330
- Olympus E-450
- Olympus E-400
- Olympus E-410
- Olympus E-420
- Panasonic Lumix DMC-L10
- Panasonic Lumix DMC-L1
- Leica Digilux 3
The Keystone Effect (also known as the Tombstone Effect or Keystone Distortion) occurs because objects closer to the camera look bigger than objects that are further away.
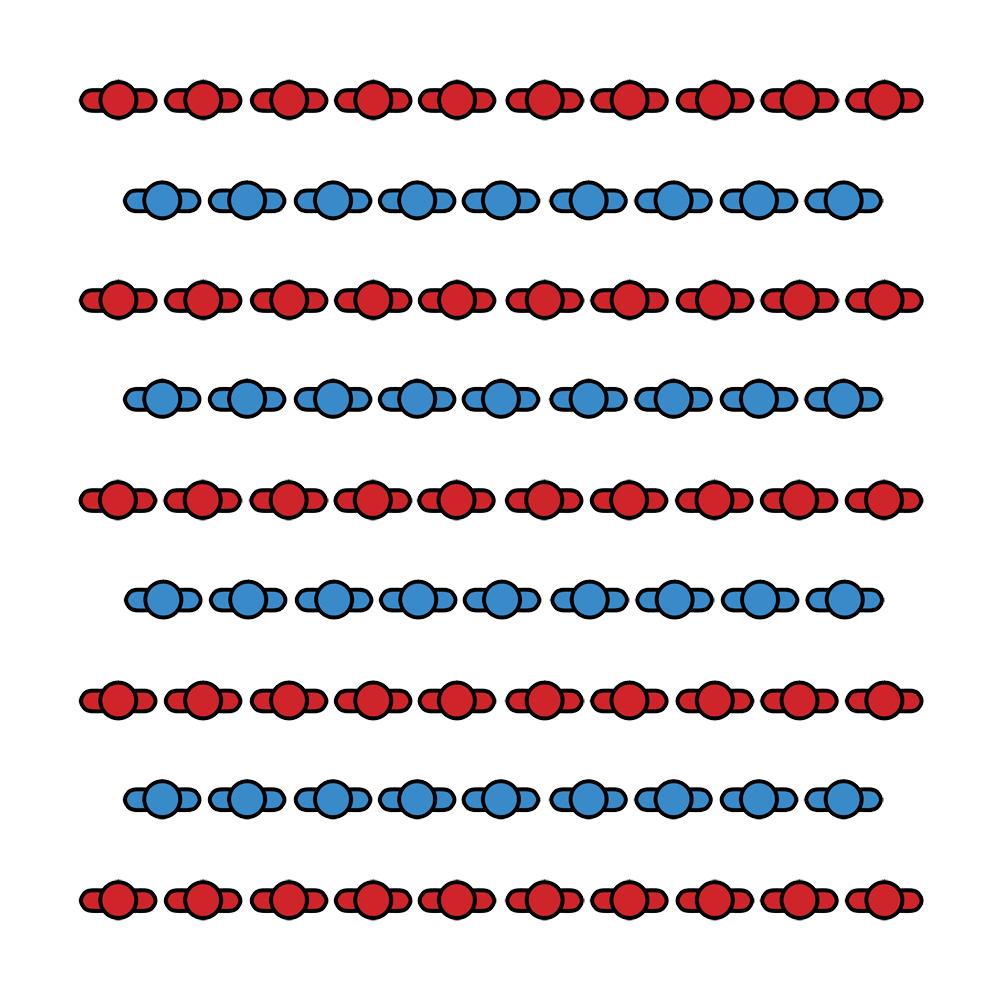
For example, in the diagram below a group of people are arranged in the shape of a square. In this image the camera is looked straight down from above the centre of the group:
Now move the camera so that it is looking down at an angle from in front of the group:
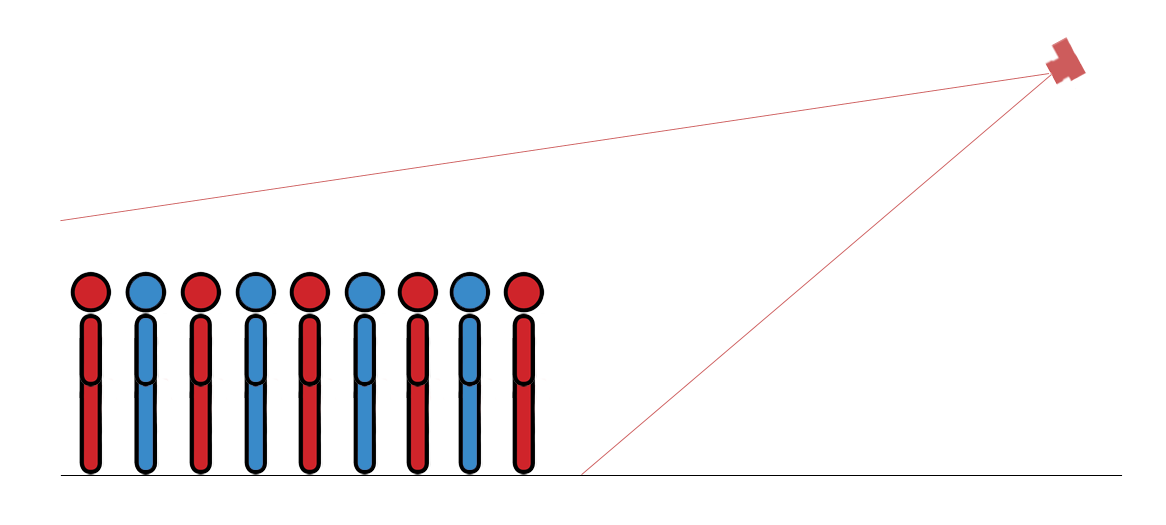
From this camera position the group would look like this:
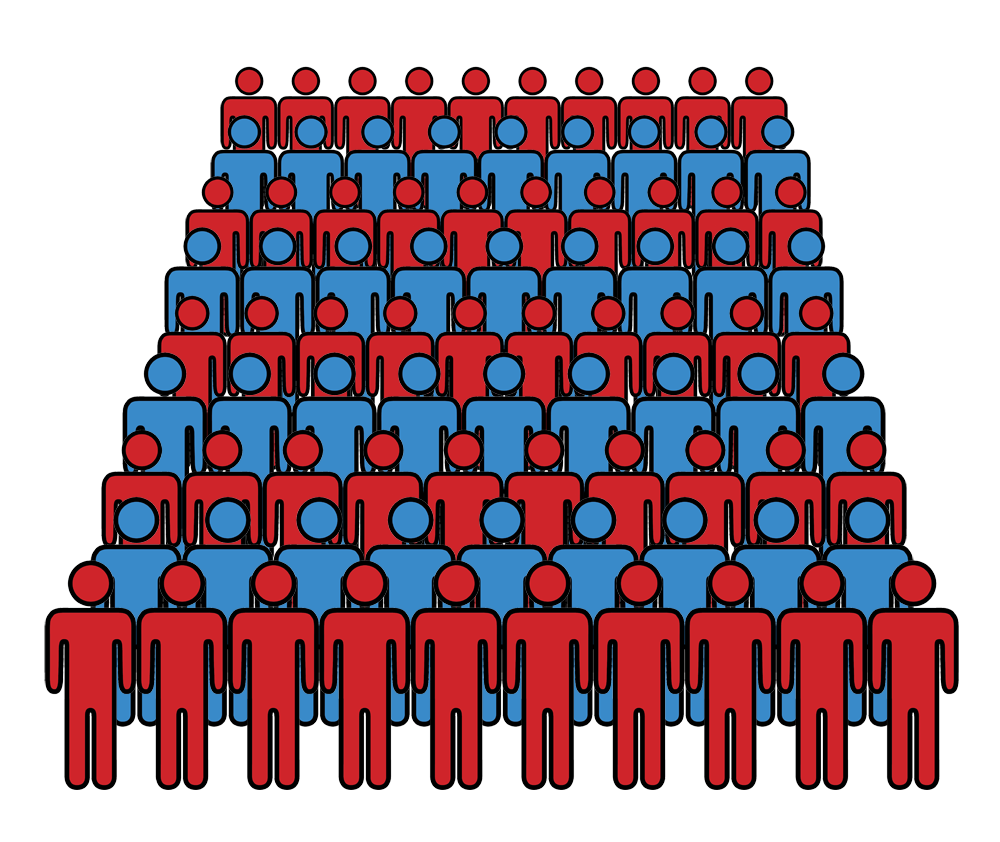
The group no longer appears square because the people at the back look smaller than the people at the front, because they are further from the camera. This is the keystone effect and is so named because the tapered trapezoid shape resembles an architectural keystone.
If you want the group to look square in the camera you need to put more people at the back and fewer at the front, as shown below:
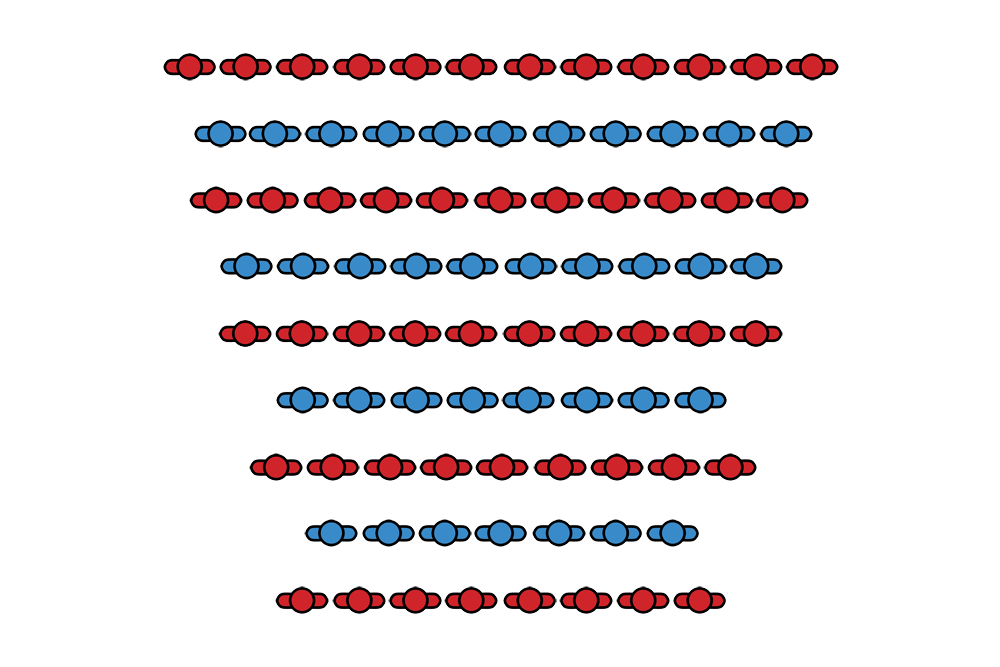
In this example there are twelve (12) people in the back row and eight (8) in the front row. When viewed from the camera this group will look square...
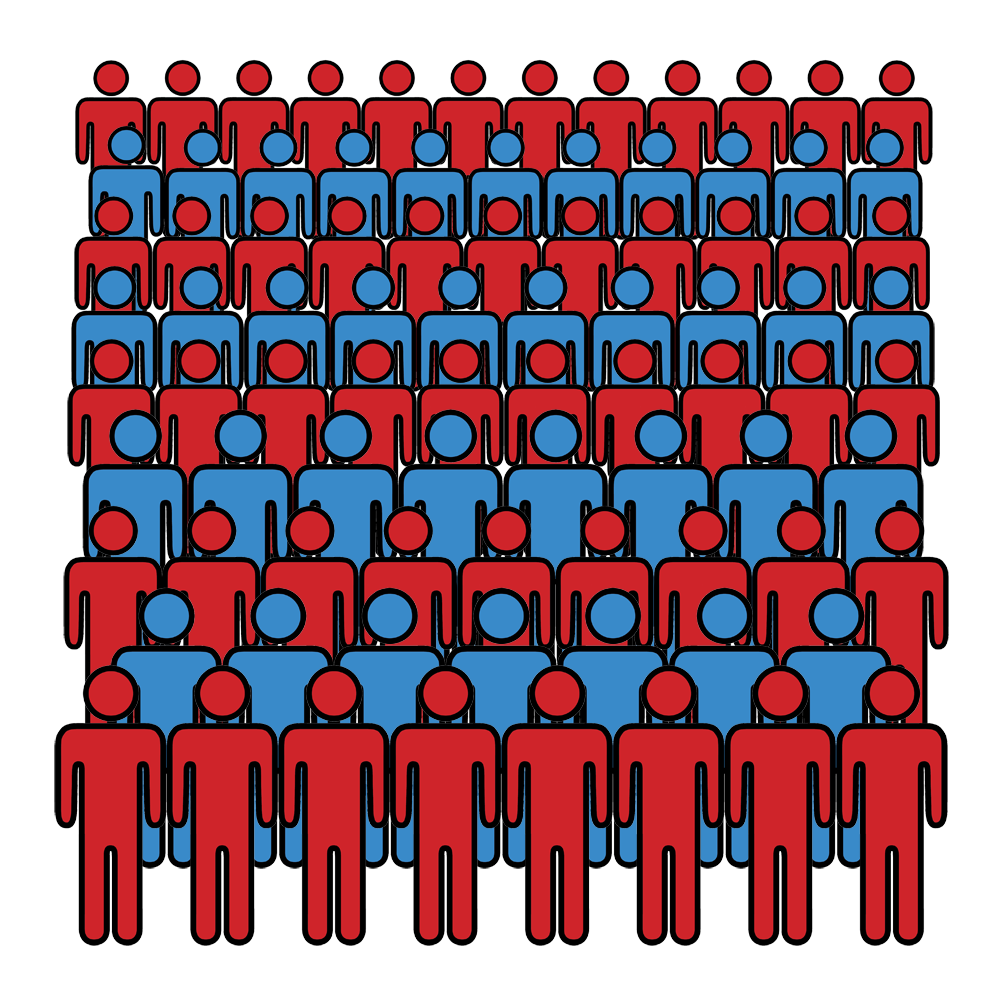
How much bigger the back row needs to be compared to the front, and how deep the group needs to be varies depending on the lens focal length and how much the camera is tilted down from horizontal.
The GroupCalc Keystone Calculator does this calculation for you. It can also do these calculations for more complex shapes (see Shape to be Drawn)
When in the Custom Shape Editor you can export the current shape to a file or import a shape from a file.
This feature is only available in the Pro version.
Export Shape
To export the current shape in the Custom Shape Editor (see How to Drawn a Custom Shape), press the menu button on your phone/tablet.
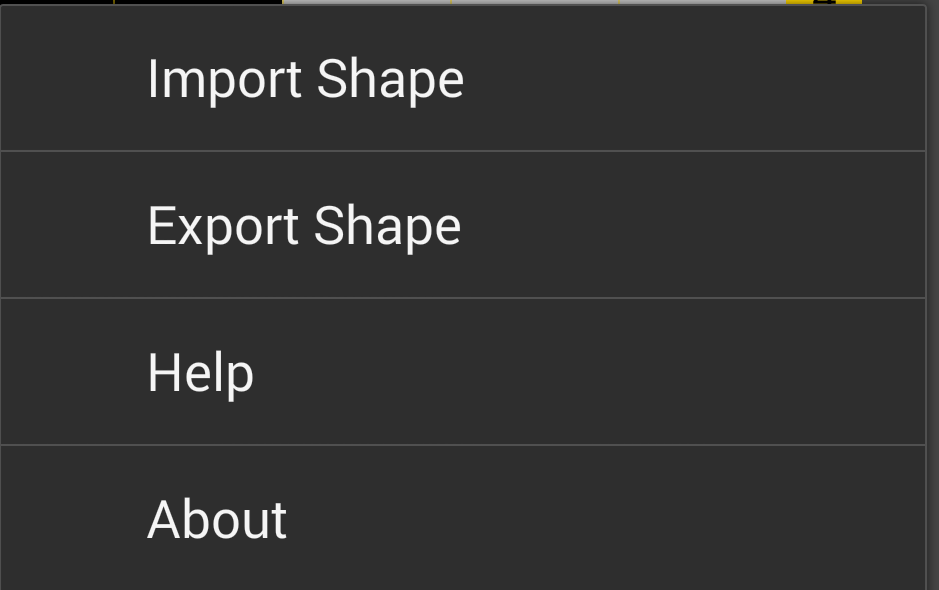
Select Export Shape. The file picker window will open.

By default the shape file will be save in the directory /Android/data/b4a.groupcalcpro/files. You can change this directory to any direct that you have permission to write to.
A suggestion file name for the exported file is generated for you in the form <date>-<time>-Shape.shp. In the above screenshot the suggested file name is 20150112-044235-Shape.shp. You can change this name to any valid file name, but it must end with .shp
When you have selected the directory and file name you want to export to, click Save. If the file already exists it will be overwritten. If it does not exist it will be created.
Import Shape
To import a shape, enter the Custom Shape Editor (see How to Drawn a Custom Shape), press the menu button on your phone/tablet.

Select Import Shape. The file picker window will open.

By default the file picker window will open in the directory /Android/data/b4a.groupcalcpro/files. You can change this directory to any direct that you have access.
A list of shape files in the selected directory will be shown for you to choose from. Shape files are any files whose name ends with .shp
Click on the name of the file you want to import then click the Select button. The file will be imported into the Custom Shape Editor overwriting whatever shape was on the canvas area.
There are many factors that affect the size and shape of a large group, so determining the best settings for your situation will require experimenting with different values. Below is a recommended approach for planning your group photo.
Once you have completed the steps below, see Keystone Results for an explanation of the values that the Keystone Calculator calculates and how to lay out your group on site.
Step 1: Enter the basic details of your group
Firstly you need to enter the details of the group you want to photograph, namely:
- The number of people in the group
- The shape you want to drawn with the group
- The size of the people in the group (are they children or adults? how much space does each person occupy)
The number of people in the group is pretty straight forward. If there is any uncertainty about the number of people it is better to overestimate rather than underestimate. If fewer people turn up it's easier to spread everyone out to fill the required space than it is to squash them closer if too many people show up.
Next you must decide what shape you want to drawn with the people. You have three options:
- A rectangle the same shape as the camera frame
- A two digit number
- A custom shape that you drawn yourself
See Shape to be Drawn for a full description of these options.
Finally you must tell the calculator the size of the people in the group. Adults take up more space than young children, and sitting children take up more space and the same children standing. The calculator needs to know on average how much space the people in the group will take up so that it can calculate how big the shape needs to be.
In the Keystone Calculator the size of the people in the group is entered as the number of people/metre2; that is how many people will fit in a square metre. See People Density for an explanation of this value and how to calculate it.
If you prefer to enter these values in feet2 or yards2 then change the measurement units in Settings.
Typical values are:
|
People/metre2 |
People/foot2 | People/yard2 | |
| Children under 11 (standing) | 4.5 | 0.42 | 3.76 |
| Children under 11 (sitting) | 3.5 | 0.33 | 2.91 |
| Older children and adults | 3.0 | 0.28 | 2.51 |
Step 2: Decide how big a border you want between the edge of the group and the edge of the frame.
Next you need to decide how much of a gap you want between the edge of the group and the edge of the photo. It is important to leave a gap to give you a bit of leeway in case the group is larger than you expected, or you can't get the camera to the exact location you require. Also, if you are going to crop the final photo to a different shape for framing then you will need to leave empty space around the edge of the group.
The size of the border is expressed as a percentage of the frame size. Recommended values are 20% or 25%. The default value is 25%.
See Border for a more detailed description.
Step 3: Determine approximate camera location in relation to the group
When taking a large group photo there are usually constraints on where the camera can be placed. Perhaps you only have a ladder to stand on, or the camera must be in an upper floor window. If you are in a constrained space there may be limitations on how far the camera can be from the group.
In this step you must determine the range of heights at which you can place the camera, and any restrictions on how far the camera can be from the group.
If you will be standing on a ladder then the camera height will be limited to 2 - 3 metres (7 - 10 feet) . If you will be in a cherry picker the may be able to be 8 to 10 metres high (26 - 33 feet).
Note these values down as you will need them in Step 5.
Step 4: Enter your starting focal length and camera tilt values
The final values that the calculator needs are the focal length of the lens you are using and the camera tilt angle.
If you have an idea of the values you would like to use then enter them into the calculator, otherwise set the camera tilt to 45o and set the focal length to a value somewhere in the middle of your zoom's range.
Note that if your camera is not using a full frame 35mm sensor then you must enter the focal length as the 35mm equivalent focal length.
Focal lengths lower than 30mm, and camera tilts less than 35o should be avoided because at these settings very small changes in the input values can lead to very large changes in the size and shape of the group.
For more information see the sections on Focal Length and Camera Tilt.
Step 5: Refine the values to get a solution that works for your location and group
When you have entered the above values the calculator will calculate the dimensions of the group, the height of the camera, and the distance of the camera from the front of the group.
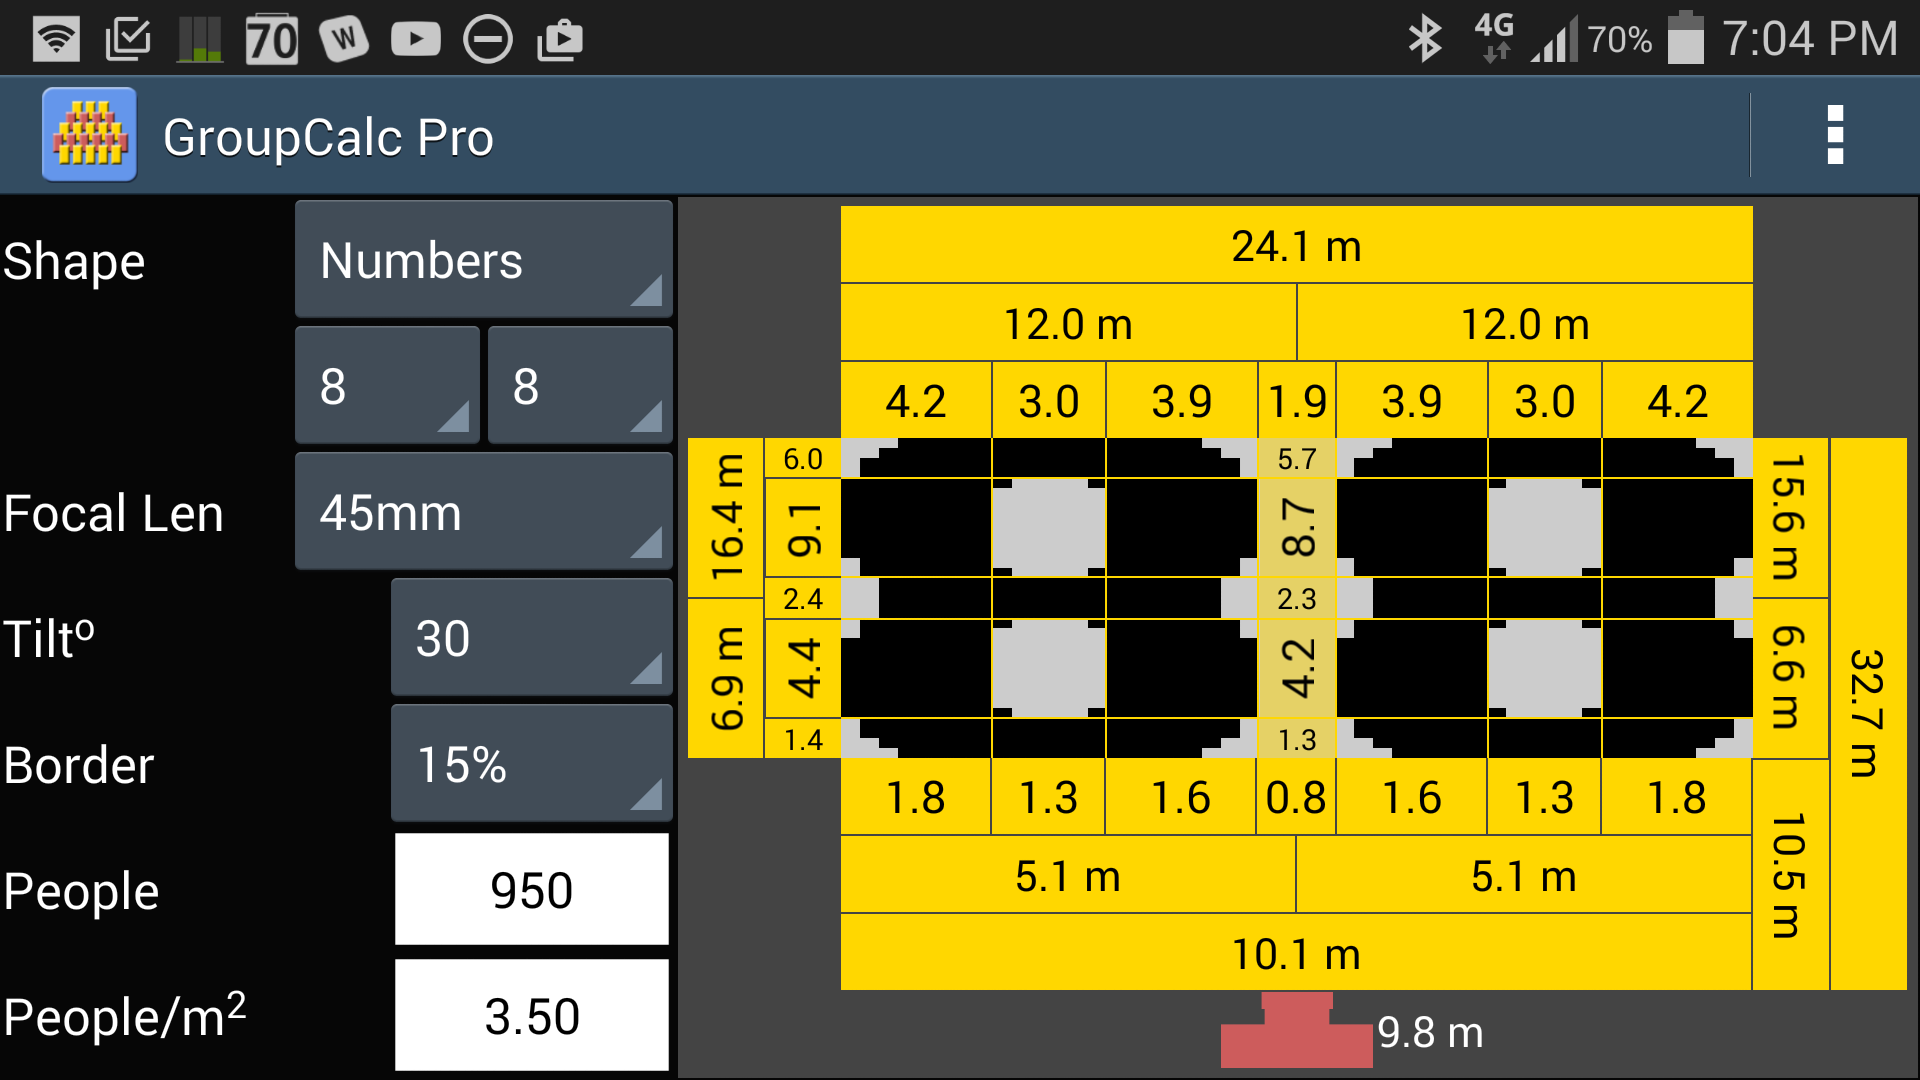
In the above example the camera will be 9.8 metres high and 10.5 metres from the front of the group.
Look at the camera height and distance to group values that you determined in step 3. If the camera height and distance to the front of the group shown by the calculator are within your required ranges then you have found your solution.
If the camera height shown by the calculator is too high or too low then try adjusting the focal length and/or camera tilt to get the camera height in your desired range, based on the following guidelines:
- Choosing a shorter focal length will lower the camera and bring the camera closer to the group.
- Choosing a longer focal length will raise the camera and move the camera away from the group.
- Decreasing the camera tilt will lower the camera and move the camera away from the group.
- Increasing the camera tilt will raise the camera and bring the camera closer to the group.
You can also raise and lower the calculated position of the camera by adjusting the border value, but this is not recommended:
- Decreasing the border will lower the camera and bring the camera closer to the group
- Increasing the border will raise the camera and move the camera away from the group
Caution: Focal lengths less than 30mm and camera tilts less than 35o should be avoid, especially in combination. At these values the keystone distortion becomes extreme and very small changes in input values will result in very large changes in the size/shape of the group and the position of the camera.
See the Keystone Results for an explanation of the Keystone Calculator Results display and how to lay out your group on site.
