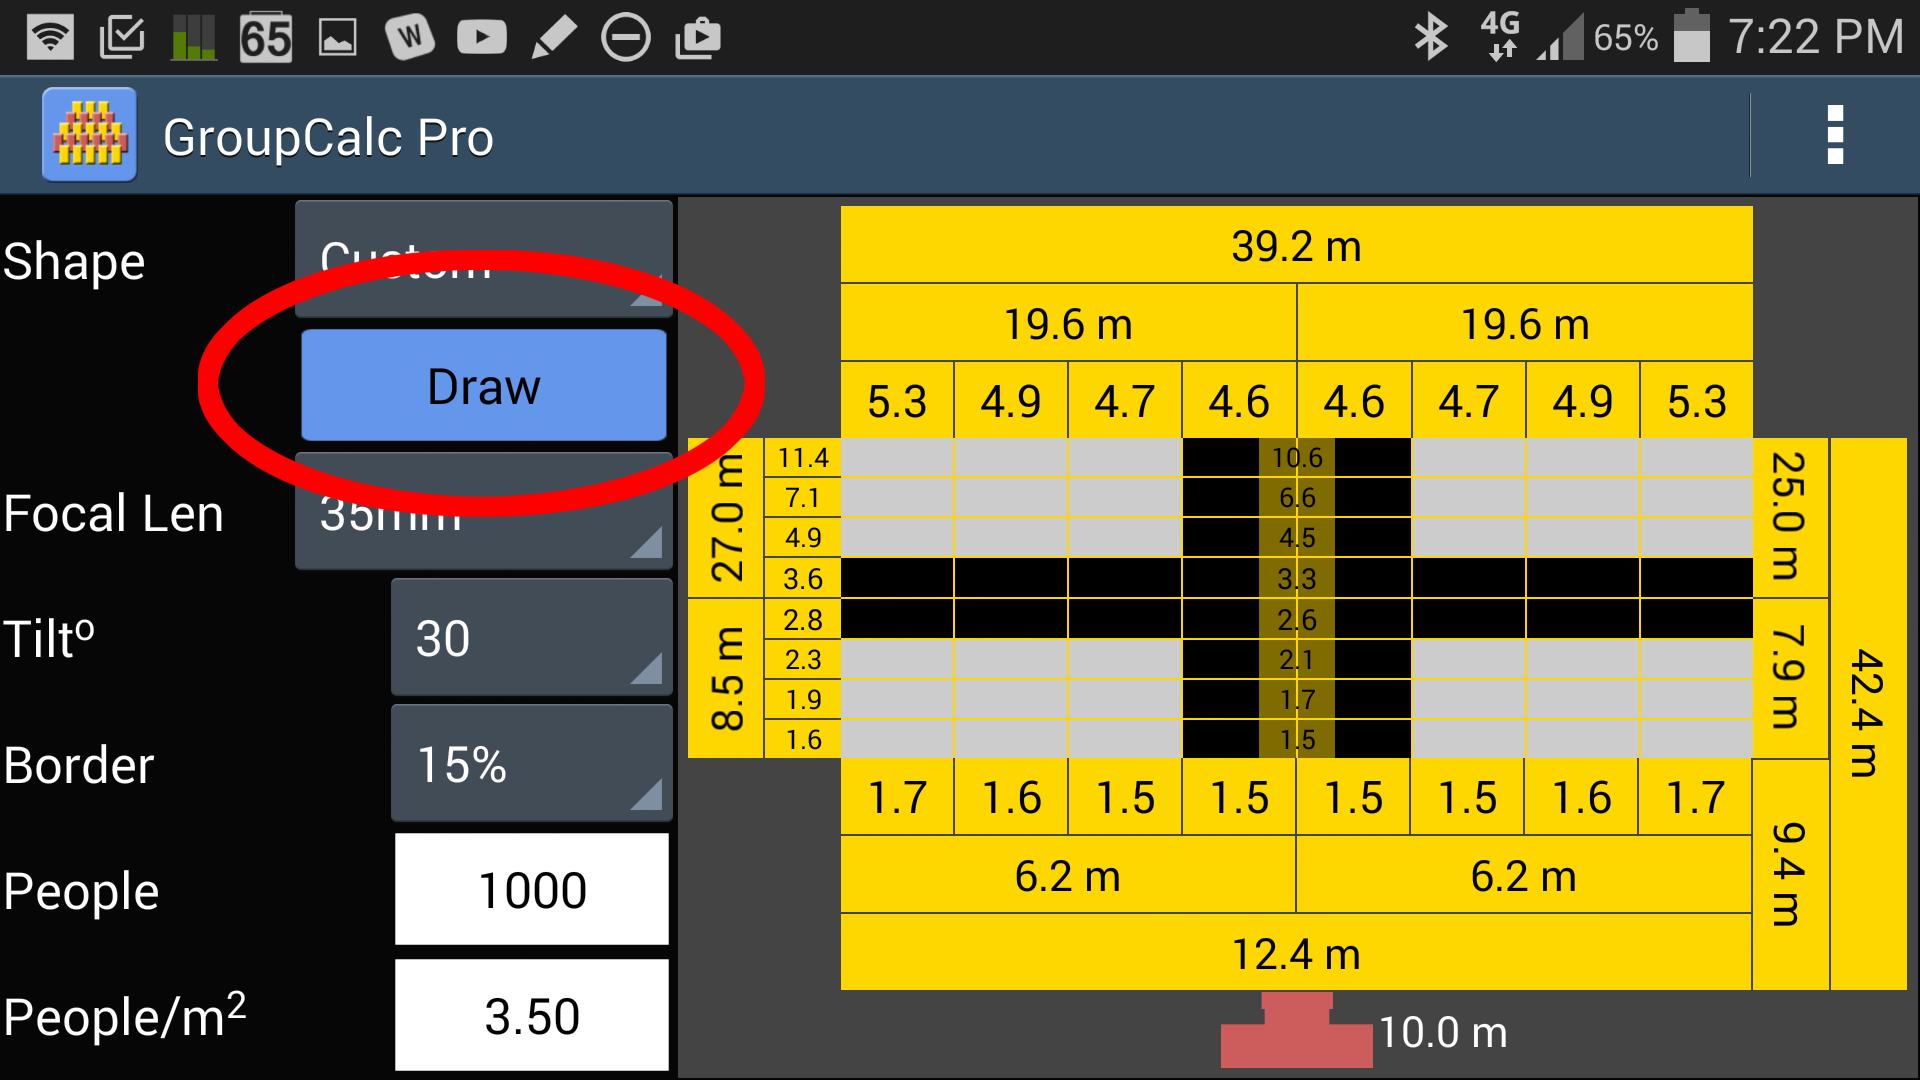
To draw a custom shape set the Shape to Custom in the Keystone Calculator, then tap the Draw button.

This will take you to the Custom Shape Editor. Note that the custom shape editor will force landscape orientation.

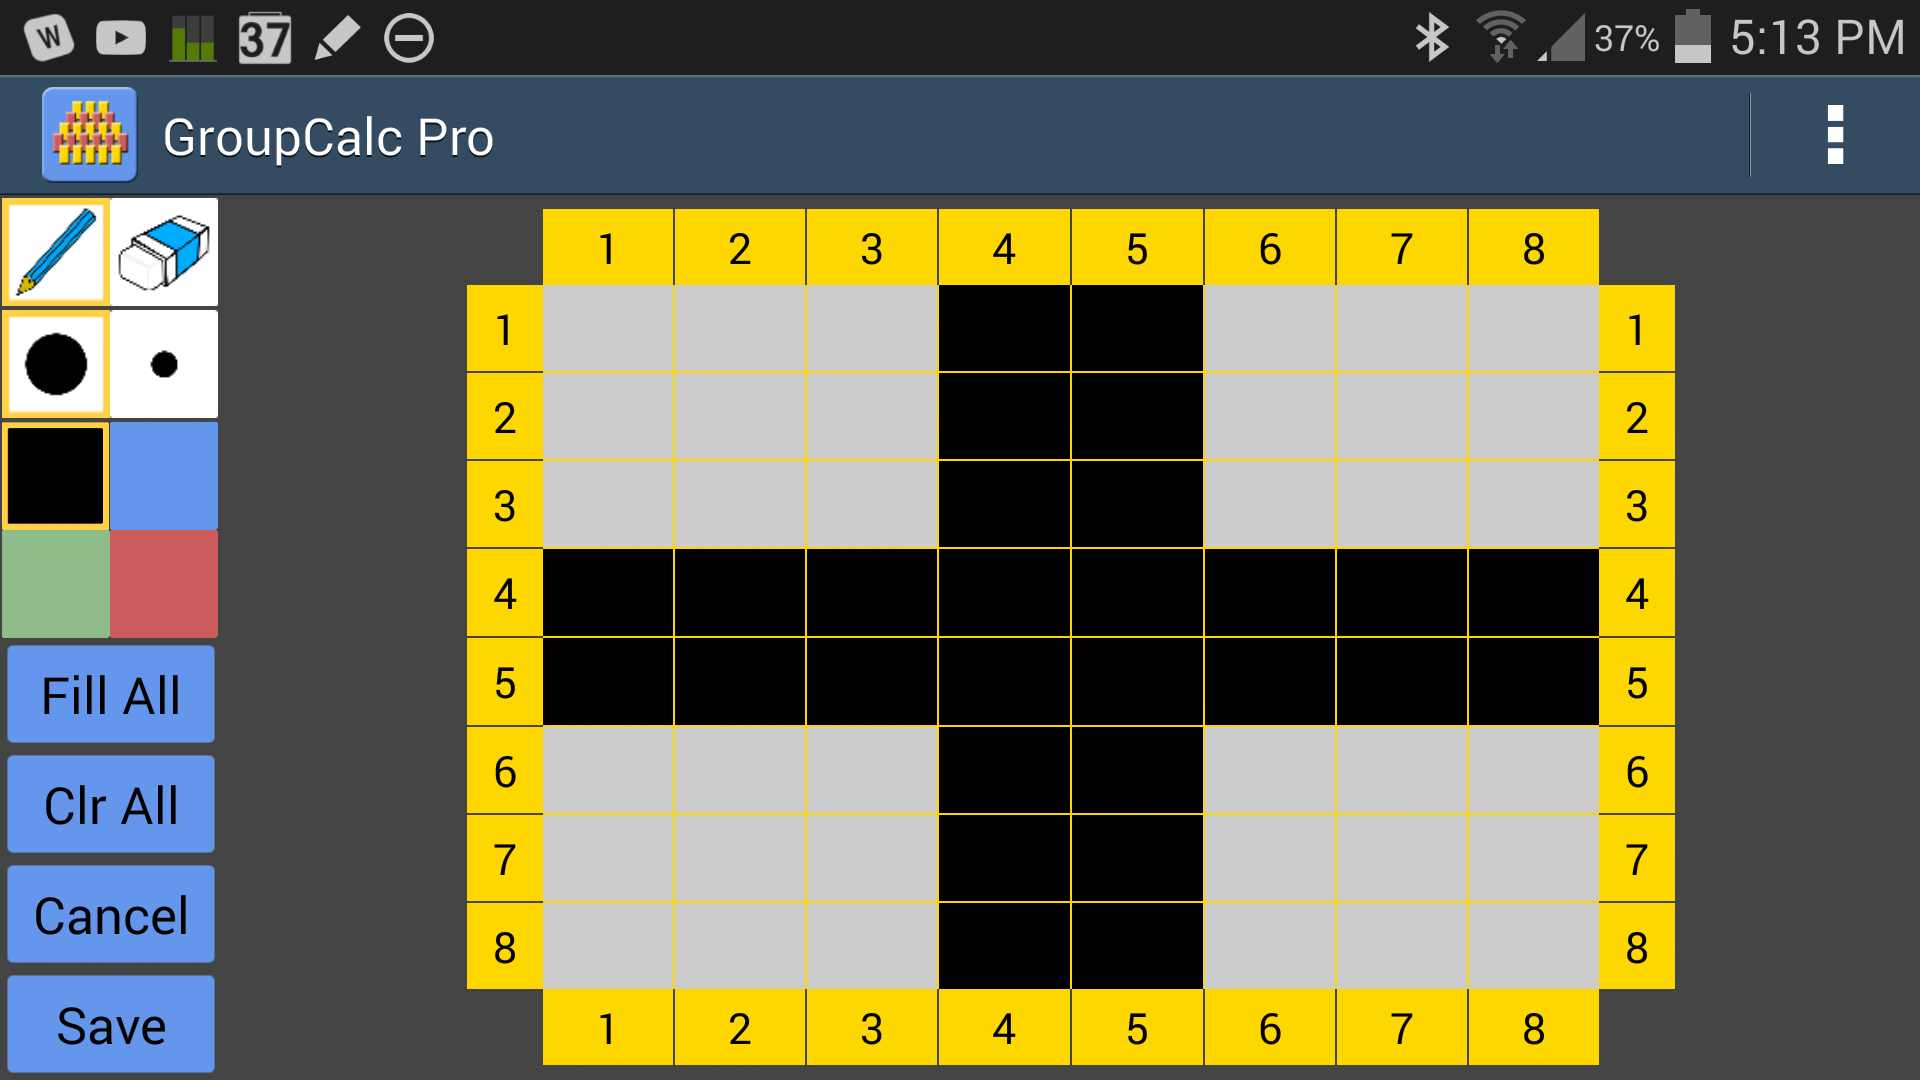
The area surrounded by the yellow rulers is the canvas area on which you draw your shape. To draw in this area touch anywhere in the canvas area and moving your finger (or stylus). The rulers and guide lines are provided to assist in drawing your shape.
Light grey is the background colour and indicates that nothing has been drawn on that area (i.e. no people will occupy this space in the photo).
The buttons on the left are used to control how you draw:
The pen and eraser buttons ![]() let you choose between drawing with the current colour and erasing when you touch the canvas area. The red border indicates which is currently selected.
let you choose between drawing with the current colour and erasing when you touch the canvas area. The red border indicates which is currently selected.
The pen size buttons ![]() let you choose between drawing (or erasing) with a thick point or a thin point. The red border indicates which is currently selected.
let you choose between drawing (or erasing) with a thick point or a thin point. The red border indicates which is currently selected.
The colour pallet buttons  let you chose the colour to draw. You have the option of four colours. The red border indicates which is currently selected. Note that if you select a colour while the Eraser is selected, then the Pen will automatically be selected.
NOTE: Drawing in multiple colours is only supported in the Pro version. In the Free version you can only draw in Black.
The Fill All button fills the entire canvas area with the currently selected colour.
The Clr All button clears the entire canvas area.
The Cancel button discards all the changes you have made to the canvas area and returns you to the keystone calculator.
The Save buttons saves your current shape and returns you to the Keystone Calculator.
Using the menu button you can also import and export shape definitions (Pro version only). See Import/Export Shape.
